|
Welcome to FrontPage Express Tutorial non video Lesson 1
First things first lets start up FrontPage express.
Click on start then scroll up to programs and then to internet explorer and
FrontPage express should be there . .
If you can't find it on the start menu then try searching your computer for it -
click on start and scroll up to search and then do a search for FrontPage
express.  Keep in mind that you may not have it - but you can
download it now.
Keep in mind to download this program file you will need a zip utility a good
one is WinZip and it is free. Keep in mind that you may not have it - but you can
download it now.
Keep in mind to download this program file you will need a zip utility a good
one is WinZip and it is free.
Ok with FrontPage express running lets get started.
Lets start with the text in FrontPage express, in the work area type the
words my web page.
Now lets save the page you just started, to do that click on the disk icon
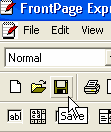 or
go to the word file or
go to the word file
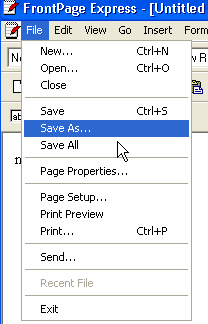 and scroll down to save as. and scroll down to save as.
Either way a save as dialog shows up.
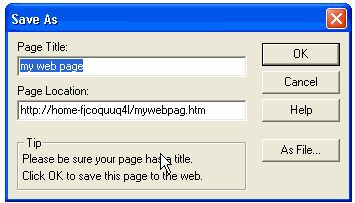 For this lesson we will save everything
to your hard drive and then in a later lesson we will put it on the internet. So
to save this to your hard drive click on the As File button. And the save
as dialog will come up. By default it will take you to your documents folder.
Create your own folder by clicking on the create folder icon For this lesson we will save everything
to your hard drive and then in a later lesson we will put it on the internet. So
to save this to your hard drive click on the As File button. And the save
as dialog will come up. By default it will take you to your documents folder.
Create your own folder by clicking on the create folder icon
 and name the new
folder my web. Now save your web page in that folder but first change the file
name of the web page inside the save as box - by default it called it mywebpag
change this to index. I will explain why later in the lesson why the name
change. Note at the top of FrontPage Express that it gives the location on your
hard drive where the web page that you just saved is located. It is a good idea
to write this down so you can bring it back again to make changes if you want. and name the new
folder my web. Now save your web page in that folder but first change the file
name of the web page inside the save as box - by default it called it mywebpag
change this to index. I will explain why later in the lesson why the name
change. Note at the top of FrontPage Express that it gives the location on your
hard drive where the web page that you just saved is located. It is a good idea
to write this down so you can bring it back again to make changes if you want.
Now I want to tell you why I wanted to name the file index, the reason for
this name as opposed to any other is because when you go to a web site the very
first page a person sees on that site is the index page which is what we are
working with now so when you put this on the internet this page will be the
first thing everyone sees.
Ok now lets do some work to the page, now click on the very left side of the
words we typed earlier (my web page). And then to center these words click on
the center button 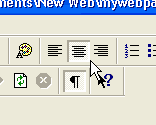 and it will center the words you type earlier. The other
functions are the align left and it will center the words you type earlier. The other
functions are the align left
 - which will take everything to the left of
the page - - which will take everything to the left of
the page -
align right 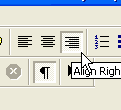 will take everything to the right of the page. Try all
these buttons so you see what they do. now center the words. and highlight the
words by clicking the left mouse button and holding the left button down while
you go over the words with the mouse pointer. And then let go of the left mouse
button. your text is highlighted will take everything to the right of the page. Try all
these buttons so you see what they do. now center the words. and highlight the
words by clicking the left mouse button and holding the left button down while
you go over the words with the mouse pointer. And then let go of the left mouse
button. your text is highlighted and you will need to highlight text to do
certain things in frontpage express so now lets make the text larger and
smaller. with the text highlighted click on the large A button and you will need to highlight text to do
certain things in frontpage express so now lets make the text larger and
smaller. with the text highlighted click on the large A button
 this makes the
text larger. Keep clicking it till it doesn't get any bigger. Now click on the
smaller A until it gets no smaller. Now make it the size you feel comfortable
with. Now lets save the page again by clicking on the disk icon - notice
that you don't need to do anything else. This is because the first time we saved
it we gave FrontPage express all the information it needed to save it. Now lets
work with more functions, highlight your text again and click on the B icon.
This bolds anything that is selected or if you are typing something and want to
make a word bolded click the bold button on type the word that you want bolded
and then click it off and continue typing. We will do that very thing later. Now
with the text highlighted click on the I button. this italics the text. Now
click on the U button and this underlines the text. Now click them all off and
it all goes away. Now lets work with text color. Highlight the text and select
the text color icon this makes the
text larger. Keep clicking it till it doesn't get any bigger. Now click on the
smaller A until it gets no smaller. Now make it the size you feel comfortable
with. Now lets save the page again by clicking on the disk icon - notice
that you don't need to do anything else. This is because the first time we saved
it we gave FrontPage express all the information it needed to save it. Now lets
work with more functions, highlight your text again and click on the B icon.
This bolds anything that is selected or if you are typing something and want to
make a word bolded click the bold button on type the word that you want bolded
and then click it off and continue typing. We will do that very thing later. Now
with the text highlighted click on the I button. this italics the text. Now
click on the U button and this underlines the text. Now click them all off and
it all goes away. Now lets work with text color. Highlight the text and select
the text color icon
 and select a color from the color dialog. and select a color from the color dialog.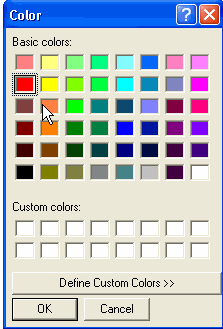 and then click
away from the text to get rid of the highlighting. Any thing that is highlighted
will be the color you select also just like the bold italic underline you can
use this while you are typing by selecting a color typing and then going back to
black. and then click
away from the text to get rid of the highlighting. Any thing that is highlighted
will be the color you select also just like the bold italic underline you can
use this while you are typing by selecting a color typing and then going back to
black.
Now lets put a background on the page as well as setting up the page as a
whole click on file and scroll down to Page properties .
A page properties
will come up. 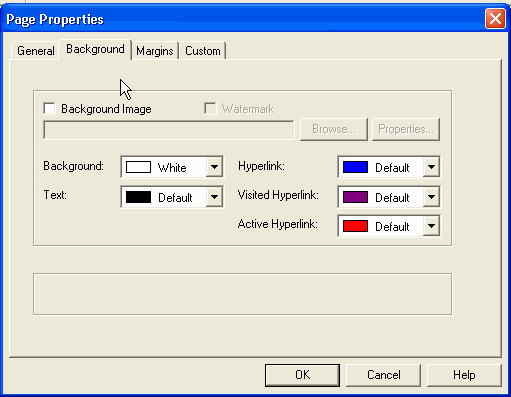 background is the tab selected so lets go over all this.
First click on the small arrow for the background and it will display the
options of colors, try some of these now and choose the color you want for the
background and then click OK. Now go back to the page properties again and do
the same for the text. For now leave all the hyperlinks the same as they are and
we will come back to this later after we make a link. Now lets do a background
Image - background is the tab selected so lets go over all this.
First click on the small arrow for the background and it will display the
options of colors, try some of these now and choose the color you want for the
background and then click OK. Now go back to the page properties again and do
the same for the text. For now leave all the hyperlinks the same as they are and
we will come back to this later after we make a link. Now lets do a background
Image - 
To add the image first you have to save the image to your hard drive to do
this put your pointer over the image and with the right mouse button click on
the image and a dialog will come up scroll to the save picture as
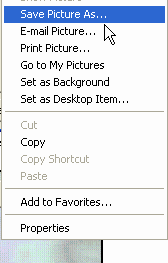
and save it to the same place as your web page and now go to the format
background and from the page properties click on the background image box and
then click on the browse button and then go to where your webpage and image file
is located and select the image file and then select ok. Your web page should
have the image file as the background. Now is a good time to save the page.
Before we move on I want to go over more of the page properties so go to
format and down to background and bring back the page properties box.
 and now click on the tag
that says General. and now click on the tag
that says General.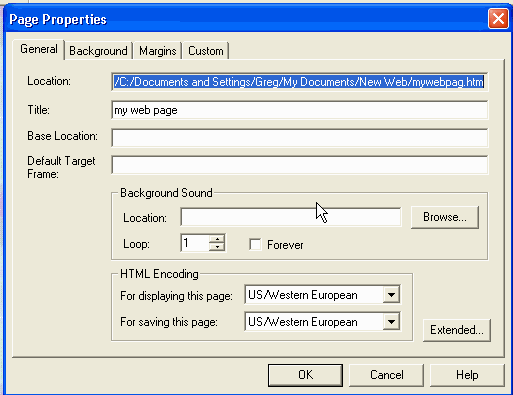
Now in here you can do the following Change the location of the page (not a good
idea) change the Title, this you can do but let me explain what it is first.
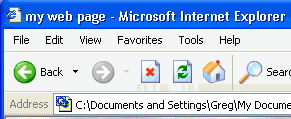
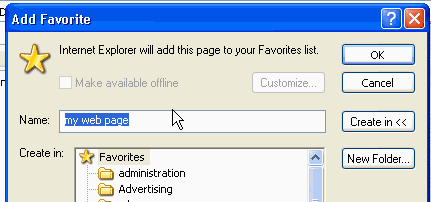
What this title is can be explained better by what it does, when your web page
is on the internet and you are there this title will show up at the very top of
the web browser and if a person chooses to bookmark your web page these are the
words that will be used. Below is some examples of what I just described.
So for the title go ahead and personalize it, as an example Greg's web
page.
Next in line is the Base Location and Default Target Frame, these tags are for a
framed page we wont even use these till a later lesson so for now leave them
alone. Background Sound is so you can have music or any other sound play on this
page, midi music is real popular. Go ahead and download this
midi file by clicking on the link.
Note that this will start up a media player such as Windows media player or Real
Player and then you can save the midi file to your hard drive from the media
player by clicking on file then scrolling down to save as. Save the file in the
same place as your web page and graphics. Now with it saved on the hard drive go
back to the page properties and click on the general tab and under Background
the name of the midi file you downloaded was babybaby.mid so in the location
type this name. The loop is for how many times to play the song or you can click
the Forever box and it will play continuously. Now go ahead and save the page
again.
Now get back to the page properties again from the (format background) and then
click on the Margins tab.
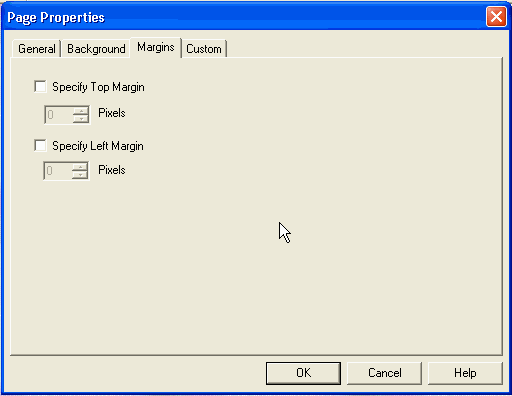
This is plain and simple it adjust the margins in pixels from the top of the
page and from the left of the page.
Now lets click over the custom tag.
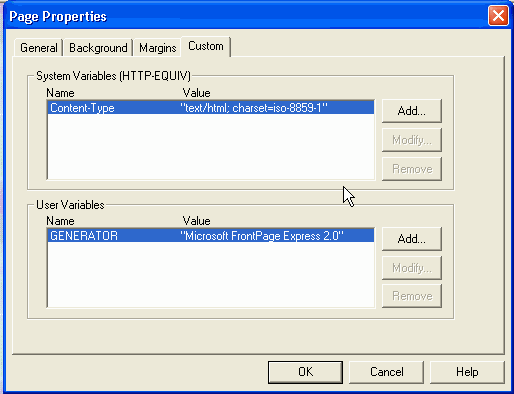
This is where you can put custom tags for search engines and so forth. We will
do this in another lesson. But I did want to show all these tags and go through
most of it. Some of it you will use and others you won't. Go ahead and close out
the page properties dialog by clicking on OK button or use the X to close it
out.
I realize that the only thing on your new web page is the title at the top
but the stuff we went over is important to set up.
Now lets go ahead and make a link on your web page to do this click next to the
right of the title we created earlier and then on your keyboard hit enter
several times till you are towards the bottom of the page and type the words
email me.
Now highlight email me and click on the link button
 and a hyperlink dialog
will show up and a hyperlink dialog
will show up
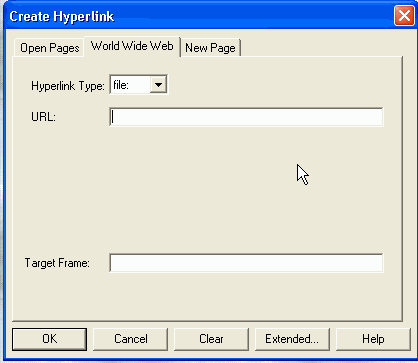 Where the URL: box
is blank it all out and then go to Hyperlink Type and click on the small arrow
and scroll down to mailto: and then in the url it will say mailto: now click
next this and type your email address so that it reads
mailto:gregyost@netzero.com
(example only) Where the URL: box
is blank it all out and then go to Hyperlink Type and click on the small arrow
and scroll down to mailto: and then in the url it will say mailto: now click
next this and type your email address so that it reads
mailto:gregyost@netzero.com
(example only)
and this makes the words email me that you typed earlier into a link that is
used to email you from.
I just wanted to go over links real fast so this is all we will do for now as
far as links.
That's it for Lesson 1 - with the exception of your home work and to print out, and for a
reference sheet to print out
so that you can reference to later.
Thank you for visiting GYEnterprise. I hope it was useful for you and that
you return for more, as well as telling your friends about us.
|